The excellent Geissele trigger comes with a set of instructions but I thought it might be helpful to provide a pictorial instruction to make it a little easier.

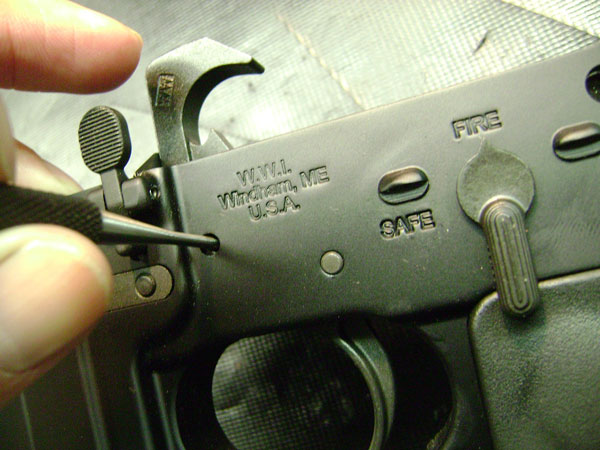
First make sure rifle is unloaded then push out the takedown and pivot pins and remove the lower from the upper.
Using a 1/8″ or smaller punch, punch out the hammer pin then the trigger pin and remove the stock hammer, trigger, disconnector and pins and put aside.

Lubricate any bearing surface with the provided grease. Hammer/trigger pin holes and sear surfaces
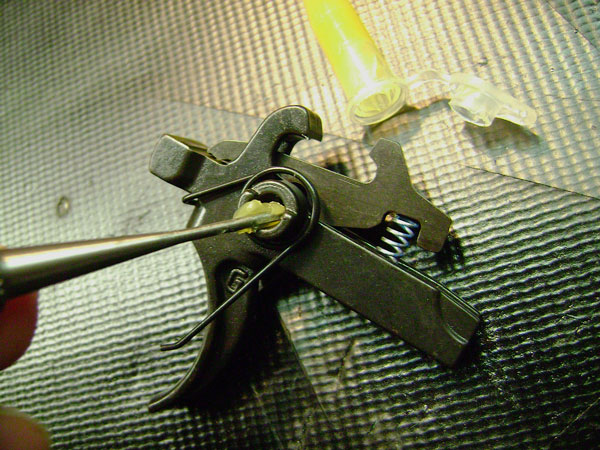
Line up the disconnector hole with the trigger pin hole in the receiver and tap in the trigger pin provided with the Geissele trigger.

Install the hammer pin retainer on the hammer. This is very important. If this is not installed the hammer pin will walk out and may cause serious and potentially dangerous malfunctions.


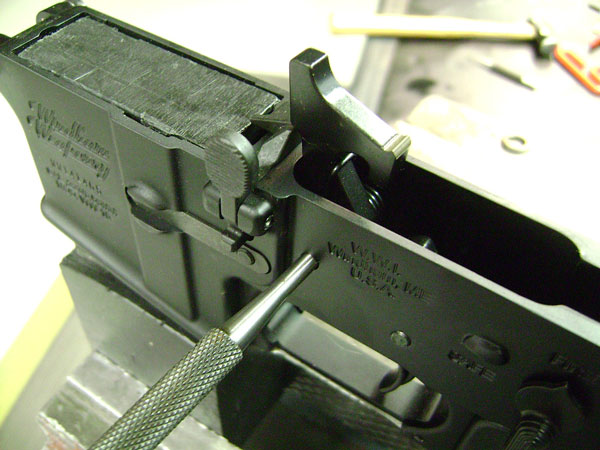
Put hammer in as shown. Make sure the legs of the hammer spring are on top of the trigger pin. It is the legs of the hammer spring that keep the trigger pin from walking out.


It’s easiest to put the hammer in if the lower is on a lower receiver vise block as the legs of the hammer spring are very stiff. Push the hammer down until the hammer pin hole lines up with the receiver and push a 5/32″ punch into the hole in the receiver to hold the hammer in place. Insert the hammer pin in the other side. You will have to move the punch around a bit to get the holes to line up. Once they are lined up push the pin in with a plastic or wooden hammer far enough so you can remove the punch from the other side. Then move the hammer around until the holes line up on the other side and push the hammer pin the rest of the way in.
Reinstall upper onto lower and function test lower for proper function. Refer to page 6 of the Windham Weaponry Operating and Safety Manual entitled “Range Safety Checks-Before You Fire”. Follow that same procedure to test the trigger group for proper function.

To purchase this fine GEISSELE 2 STAGE (G2S) TRIGGER, click here: